-
[React] React redux-saga 프로젝트 시작하기 #3Front-End/React 2023. 12. 20.
Counter Page 만들기.
우리는 state관리를 하기 전에 화면 그리드부터 만들것이며, UI 라이브러리는 react-bootstrap을 사용할 것이다.
shell에서 아래 명령어를 입력해 react-bootstrap을 설치하고
npm install react-bootstrap프로젝트 root폴더의 index.js 파일에 아래 코드를 import하여 모든 파일 내에서 전역적으로 사용할 수 있게 해준다.
현재 프로젝트에서는 index.js파일이 최상단이어서 적용한거지 구조가 다르면 무조건 초기 렌더가 되는 최상단 파일에 적용해야 한다
import React from 'react';
import { createRoot } from 'react-dom/client';
import { Provider } from 'react-redux';
import App from './App';
import createStore from './store/store';
import 'bootstrap/dist/css/bootstrap.min.css'; // <- 이 부분 추가

const container = document.getElementById('root');
const root = createRoot(container);

const store = createStore();

const render = () => {
  root.render(
    <BrowserRouter>
      <Provider store={store}>
        <App />
      </Provider>
    </BrowserRouter>
  );
}

render();
이러면 각 컴포넌트에서 import { Form, Button } from 'react-bootstrap'만 사용해서 라이브러리를 불러올 수 있다.
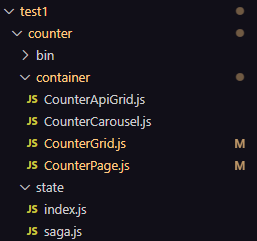
test1/counter 폴더에 container, state 폴더를 만들어주고 아래처럼 파일을 만들어줍니다.
주의해야 할 점은 JSX에서 사용되는 파일들에서 import로 가져오는 사용자 지정 태그들은 항상 파일의 첫 문자가 대문자로 시작하여야됩니다. 그렇지 않으면 해당 태그는 html 내장태그로 인식하게 됩니다.
CounterPage.js는 해당 화면의 최상단 페이지이며 초기값 설정, 화면 배치 등에 대한 구조적인 부분만 가지고 있습니다.
import React from 'react';
import { Row, Col, Container } from 'react-bootstrap';
import CounterGrid from './CounterGrid';

const CounterPage = () => {
  return (
    <>
      {
        (
          <div>
            <Container>
              <Row>
                <Col>
                  <CounterGrid />
                </Col>
              </Row>
            </Container>
          </div>
        )
      }
    </>
  )
}

export default React.memo(CounterPage);
CounterGrid는 해당 페이지 안에 table속성을 갖는 그리드가 있습니다.
import React from 'react';
import { Form, Button, Table } from 'react-bootstrap';
import { FormGroup, FormLabel, FormControl, Row, Col } from 'react-bootstrap';

const CounterGrid = () => {
  const number = 1;
  const fieldNum = 1;
  const inc = () => {
    // 값 증가
  }
  const dec = () => {
    // 값 감소
  }

  return (
    <Form>
      <Table striped bordered hover variant="dark">
        <tbody>
          <tr>
            <td colSpan={2} align='center'>
                <h1>{number}</h1>
            </td>
          </tr>
          <tr style={{ height: '80px'}}>
            <td colSpan={2}>
            <FormGroup controlId={`formInput${number}`} as={Row} >
              <FormLabel column sm={2}>값 입력</FormLabel>
              <Col>
                <FormControl />
              </Col>
            </FormGroup>
            </td>
          </tr>
          <tr>
            <td align='center'>
              <Button onClick={dec}> - {fieldNum} </Button>
            </td>
            <td align='center'>
              <Button onClick={inc}> + {fieldNum} </Button>
            </td>
          </tr>
        </tbody>
      </Table>
    </Form>
  )
}
export default CounterGrid;
어느정도 만들어졌으면 바로 렌더링을 하는게 아닌 react-router를 이용해 페이지 이동을 만들어 Home으로 이동과 Counter 페이지로 이동하는것을 만들어 볼 것이다
'Front-End > React' 카테고리의 다른 글
[React] React redux-saga 프로젝트 시작하기 #4 (1) 2023.12.20 [React] React redux-saga 프로젝트 시작하기 #2 (0) 2023.12.20 [React] React redux-saga 프로젝트 시작하기 #1 (0) 2023.12.20